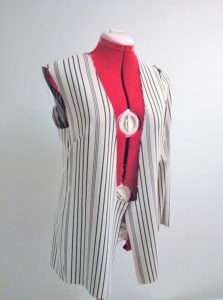
It has happened to many of us, and it still happens to me, that I take a pattern, I make the garment and then when I’m going to try it, I have a big chest, waist or hip. Or even up on the back and there are some very ugly wrinkles and you have to adjust the garment.
Well, I am going to show you the way in which I usually modify these garments once sewn and tested in the body. It requires a little bit of expertise and some sewing skills.
But anyway it is quite easy to do and even if you are a rookie you can do it. Even this method will be useful for clothes that you already have at home and that you need to adjust well because you have left wide or why you want to make some modification and want to adjust it more to your figure.
What do I have to know to adjust a garment?
The first thing you have to know is the measurements of your body. And how do you want that garment if you want it fitted everywhere or only on the hip or just on the chest?
It will also influence a bit the fabric to adjust the garment or not. If you have already washed that fabric before taking the garment you know that if it shrinks you will be a little bit or maybe it will not shrink again. It is also very important if we are going to want it very tight because if it is going to take us it will be even tighter and that must be taken into account enough.

What do I need?
You will need these materials:
- The garment
- Pins
- soap or pencil to mark
- scissors
- needle and thread or sewing machine
- a mannequin, if you are going to make the garment to a standard size or your own body and a mirror
If you are going to make the modifications of a garment of yours on your own body you will need help from another person. When you move the garment moves with you and you can make wrinkles where they should not be or adjust areas that stretch and when you get well you will be very tight or too loose.
If you do not have anybody or a mannequin, the other option is to do it directly with your measurements. It is a step more complicated and maybe it is not adjusted how you would like. This step I will show you in another post with another video.
Well I do not roll up anymore and I leave the video so you can see how it is done. The subtitles are in Spanish but you can change them.
And here the entrance. It is the method that I use and I was taught to do. Surely there are a thousand more forms and each one does it in a different way.
If you are going to do it on your body, turn the garment over and do it the other way round, it will be more comfortable to see the sewing lines and where you have to adjust and not have to turn it over again.
If you use another way to adjust the garments once you have already sewn them or garments that you already have in your closet and that have remained large or small, leave me in the comments so you can see it and thus have all new forms and methods.
And of course if you have already finished with all the sewing projects you had and want to start a new one, do not forget to visit my store. New summer models that you will surely love, so I invite you to visit them and buy them.

